
Now we are going to setup the Raspberry Pi with Midnight Commander (MC), the Network File System (NFS), the powerful PostgreSQL server, a PASCAL IDE, some tools, I²C and SPI.
Hereafter, PC means a PC with a LINUX operating system, here KUBUNTU 14.04 is used.
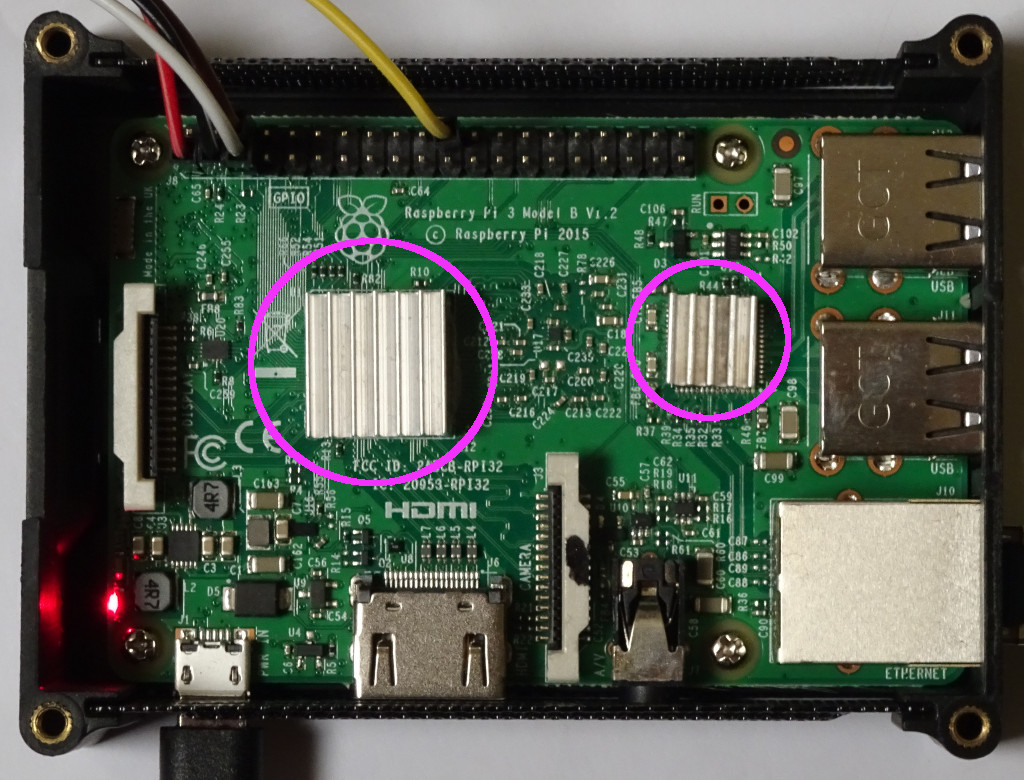
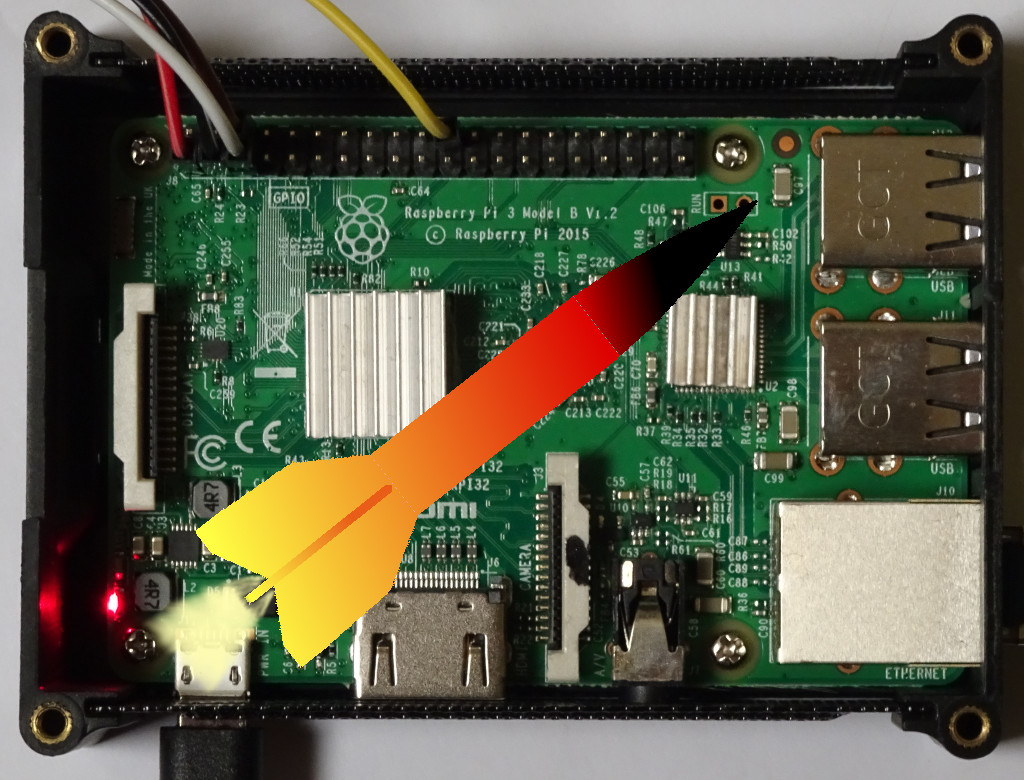
Heat Sinks
In order to run the Raspberry Pi in continuous operation and for overclocking, it is advantageous to use heat sinks. Here, two little heat sinks are used for the two main ICs.
Terminal settings and swap size
Connect from the PC to the Raspberry Pi, using krdy.
Open the terminal on the Raspberry Pi.
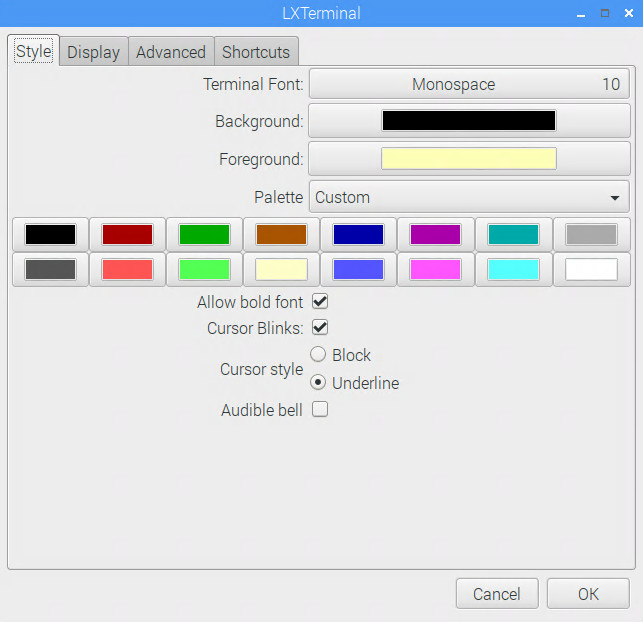
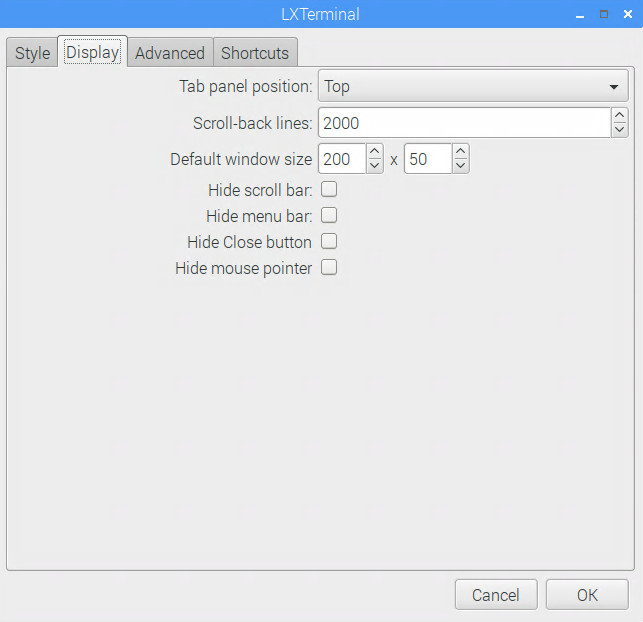
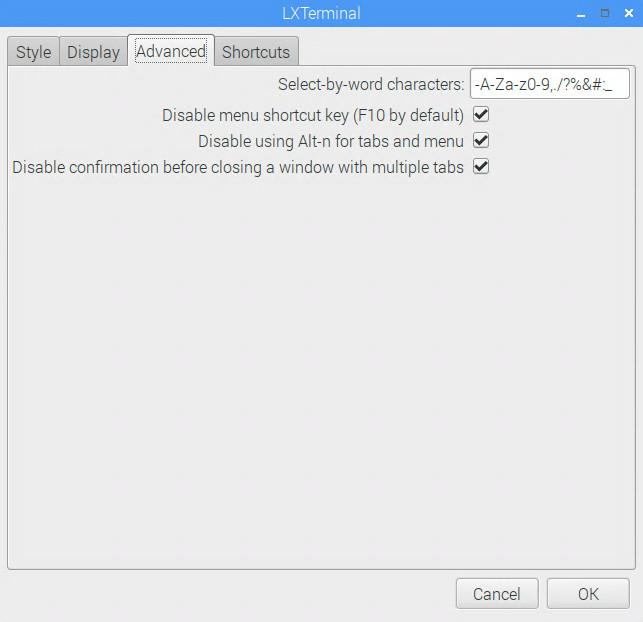
Since the default settings of the terminal are quite small, the settings are changed to a larger size and the text color to a sunny pastel yellow (use your personal preferences, or as the Roman says: DE GUSTIBUS NON DISPUTANDUM EST):
Before we install the software, the software cache on the Raspberry Pi is updated:
sudo apt-get update
sudo apt-get dist-upgrade
sudo apt-get autoremove
The swap size on the Raspberry Pi is a little small, we increase it since we have an SSD. The swap size is defined in the file /etc/dphys-swapfile. Open the file:
sudo nano /etc/dphys-swapfile
and change the parameter CONF_SWAPSIZE:
CONF_SWAPSIZE=2048
Restart swapping and controll swap size:
sudo systemctl stop dphys-swapfile
sudo systemctl start dphys-swapfile
sudo service dphys-swapfile status
Setup Midnicht Commander (MC) and add a dark theme
Now Midnight Commander (MC) will be installed, which will help us to easily access and edit files as root.
sudo apt-get install mc
Install a dark theme for mc (do not start mc until all following commands are finished as mc overwrites this file at the end of the program):
sudo wget http://www.seismometer.info/files/root_config_mc/ini -O /root/.config/mc/ini
sudo wget http://www.seismometer.info/files/root_config_mc/mc.keymap -O /root/.config/mc/mc.keymap
sudo wget http://www.seismometer.info/files/root_config_mc/panels.ini -O /root/.config/mc/panels.ini
sudo mkdir /root/.local/share/mc/skins
sudo wget http://www.seismometer.info/files/root_local_share_mc/skins/skin_01.ini -O /root/.local/share/mc/skins/skin_01.ini
Setup Network File System (NFS)
In order to have access from the PC to the file system of the Raspberry Pi, NFS on the Raspberry Pi is installed inside the terminal.
sudo apt-get install nfs-kernel-server
Next we need to set the permissions of the NFS by adding a line to the file /etc/exports:
sudo echo / *(rw,sync,no_subtree_check,all_squash,anonuid=1000,anongid=1000) | sudo tee -a /etc/exports
Restart the nfs server:
sudo /etc/init.d/nfs-kernel-server restart
If you have installed NFS on your PC too, you can mount to the file system of the Raspberry Pi by creating a directory /mnt/raspberry and using the following command on your PC (use your own IP address of the Raspberry Pi, here 192.168.1.100):
sudo mount 192.168.1.100:/ /mnt/raspberry
Setup PostgreSQL server
Now PostgreSQL server will be installed. At this point of time the newest PostgreSQL version is 9.6. If you like, you can check the versions by “sudo apt-cache search postgresql | less”:
sudo apt-get install postgresql-9.6
Login to the PostgreSQL server:
sudo -u postgres psql
Inside the PostgreSQL server, change the password for user postgres:
\PASSWORD postgres
and quit the PostgreSQL server:
\q
Check the location of the config file:
sudo -u postgres psql -c 'SHOW config_file'
                 config_file
/etc/postgresql/9.6/main/postgresql.conf
(1 row)
In the directory /etc/postgresql/9.6/main/ two files need to be changed: postgresql.conf and pg_hba.conf.
Before changing the files, stop the server:
sudo /etc/init.d/postgresql stop
Change pg_hba.conf using the nano editor:
sudo nano /etc/postgresql/9.6/main/pg_hba.conf
Add one line after “host all all 127.0.0.1/32 md5” using your own IP address of your PC (here 192.168.1.6):
host all all 192.168.1.6/32 md5
Change postgresql.conf using the nano editor:
sudo nano /etc/postgresql/9.6/main/postgresql.conf
Add the following lines to postgresql.conf, if the parameter already exist, comment it out:
listen_addresses = '*'
shared_buffers = 256MB
work_mem = 16MB
effective_io_concurrency = 1
checkpoint_completion_target = 0.7
effective_cache_size = 512MB
log_timezone = 'GMT'
timezone = 'GMT'
Please make sure that permissions and ownerships of the files don’t change, or PostgreSQL Server will not work correctly (it took several days to find that problem).
Permissions pg_hba.conf : -rw-r-----
Owner pg_hba.conf : postgres
Group pg_hba.conf : postgres
Permissions postgresql.conf : -rw-r--r--
Owner postgresql.conf : postgres
Group postgresql.conf : postgres
Start the PostgreSQL server:
sudo /etc/init.d/postgresql start
Add a new user pi to the PostgreSQL server, please adjust your password, and create a database with name seismometer_db:
sudo -u postgres psql -c "CREATE USER pi WITH PASSWORD 'test123';"
sudo -u postgres psql -c "CREATE DATABASE seismometer_db WITH OWNER = pi;"
For administration of the database, the program pgAdmin III is used on the PC. Install pgAdmin III on your PC:
sudo apt-get install pgadmin3

New server in pgAdmin III
In pgAdmin III add a new server with the parameters of the image (use your own IP of course).
Double click the new server in order to open the connection. You will get a warning message about pgAdmin III supporting postgreSQL only up to version 9.3, but that is no problem as only standard PostgreSQL commands are used. Click on the database seismometer_db to open it.
Setup PASCAL IDE
Many discussions are running about the best PASCAL IDE, for this project CodeTyphon is used as the PASCAL IDE, as it directly supports the Raspberry Pi, comes with many components ready to use, and works like a charm. Concerning the best PASCAL IDE or the best programming language, ever since back to the time where PASCAL stood against BASIC or BASIC against Assembler, fierce battles have been fought from the supporters of each side with sometimes uncharming and polemic arguments. Leaving the political speeches to other people, we will be conducted in a constructive spirit in order to finish our project. Download the latest CodeTyphon version from www.pilotlogic.com/, here CodeTyphon Studio 6.70 from 15.01.2019 is used, unzip it and start installation:
cd /home/pi/
wget http://www.pilotlogic.com/codetyphon/zips/CodeTyphonIns.zip
unzip CodeTyphonIns.zip
cd CodeTyphonIns
sudo ./install.sh
The following menu appears:
====================================================
CodeTyphon Studio
Version 6.70 (GEN 6)
Installation for: Linux-Solaris-FreeBSD-MacOS
====================================================
-----WARNING------ WARNING ----WARNING-------
You tryng to install CT as root
This is NOT the correct procedure.
You MUST start CodeTyphon Installation as normal user
with sudo root privileges
---------------------------------------------
0) Install CodeTyphon Studio
9) Exit
>>> Select an action (press 0..9 key):
Choose “0) Install CodeTyphon Studio”.
On the next menu
====================================================
CodeTyphon Studio 6.70 Setup for Linux32
Settings: Platform=gtk2 Multiarch Mode=0
====================================================
0) Install System Libraries
1) Run CodeTyphon Center (CTC)
11) -- Platform (widget) Setup
12) -- Multi-Architecture Setup
3) Remove FreePascal
4) Remove and Build FreePascal
5) Remove Typhon IDE
6) Remove and Build Typhon IDE
7) Remove ALL
8) Remove and Build ALL
9) EXIT
>>> Select an action (press 0..9 key):
Choose “0) Install System Libraries”.
Finally, on the menu
====================================================
CodeTyphon Studio 6.70 Setup for Linux32
Settings: Platform=gtk2 Multiarch Mode=0
====================================================
0) Install System Libraries
1) Run CodeTyphon Center (CTC)
11) -- Platform (widget) Setup
12) -- Multi-Architecture Setup
3) Remove FreePascal
4) Remove and Build FreePascal
5) Remove Typhon IDE
6) Remove and Build Typhon IDE
7) Remove ALL
8) Remove and Build ALL
9) EXIT
>>> Select an action (press 0..9 key):
Choose “8) “Remove and Build ALL”, which will take several minutes to build.
Finally choose “9) EXIT”.
Start CodeTyphon from the “Applications Menu/Programming”, select “Typhon-IDE/Typhon 32 IDE, Build BigIDE” in order to build Typhon32 BigIDE. After building the big IDE, there will be a “Typhon32” icon in the “Applications Menu/Programming” menu. Start Typhon32, and check, if you see the component tab “SQLdb”. If “SQLdb” is not visible, build Typhon32 BigIDE again, sometimes the first build doesn’t work. Copy the following files for a Delphi like layout with glass docking and some formatter templates:
wget http://www.seismometer.info/files/home_pi_typhon32/codetemplates.dci -O /home/pi/.typhon32/codetemplates.dci
wget http://www.seismometer.info/files/home_pi_typhon32/editoroptions.xml -O /home/pi/.typhon32/editoroptions.xml
wget http://www.seismometer.info/files/home_pi_typhon32/environmentoptions.xml -O /home/pi/.typhon32/environmentoptions.xml
wget http://www.seismometer.info/files/home_pi_typhon32/fpcdefines.xml -O /home/pi/.typhon32/fpcdefines.xml
wget http://www.seismometer.info/files/home_pi_typhon32/glassdockruntime.xml -O /home/pi/.typhon32/glassdockruntime.xml
wget http://www.seismometer.info/files/home_pi_typhon32/helpoptions.xml -O /home/pi/.typhon32/helpoptions.xml
wget http://www.seismometer.info/files/home_pi_typhon32/includelinks.xml -O /home/pi/.typhon32/includelinks.xml
wget http://www.seismometer.info/files/home_pi_typhon32/jcfsettings.cfg -O /home/pi/.typhon32/jcfsettings.cfg
wget http://www.seismometer.info/files/home_pi_typhon32/packagefiles.xml -O /home/pi/.typhon32/packagefiles.xml
During compilation, the files crtbegin.o and crtend.o are not found, which causes nasty linker warnings. Use the following command to add the correct path to the file /usr/local/codetyphon/fpc/fpc32/bin/arm-linux/fpc.cnf, and the warnings are blown away:
echo -Fl/usr/lib/gcc/arm-linux-gnueabihf/6 | sudo tee -a /usr/local/codetyphon/fpc/fpc32/bin/arm-linux/fpc.cnf
Setup Tools
Install the tool pg_activity by:
sudo apt-get install pg-activity
Install the Disk Usage Analyzer baobab:
sudo apt-get install baobab
Install sysbench:
sudo apt-get install sysbench
Desktop Tuning
Change the position of the task bar:
Right click at the desktop, choose “Desktop Preferences”, “Taskbar” and select size: “Small (16×16)”, Position: Bottom.
Add a fractal background by:
sudo wget http://www.seismometer.info/images/mandelbrot_fractal_dark_1920.jpg -O /usr/share/rpd-wallpaper/
Right click at the desktop, choose “Desktop Preferences”, “Picture” and select “mandelbrot_fractal_dark_1920.jpg”.
Add some desktop application files for pg_activity, Typhon32, mc and others:
cd /home/pi/
mkdir batch
umask 022
wget http://www.seismometer.info/files/batch/check_i2c_speed.sh -O /home/pi/batch/
chmod 777 /home/pi/batch/check_i2c_speed.sh
wget http://www.seismometer.info/files/batch/pg_activity.sh -O /home/pi/batch/
chmod 777 /home/pi/batch/pg_activity.sh
wget http://www.seismometer.info/files/batch/reboot.sh -O /home/pi/batch/
chmod 777 /home/pi/batch/reboot.sh
wget http://www.seismometer.info/files/batch/system_update.sh -O /home/pi/batch/
chmod 777 /home/pi/batch/system_update.sh
wget http://www.seismometer.info/files/Desktop/baobab.desktop -O /home/pi/Desktop/
wget http://www.seismometer.info/files/Desktop/leafpad.desktop -O /home/pi/Desktop/
wget http://www.seismometer.info/files/Desktop/mc.desktop -O /home/pi/Desktop/
wget http://www.seismometer.info/files/Desktop/pg_activity.desktop -O /home/pi/Desktop/
wget http://www.seismometer.info/files/Desktop/reboot.desktop -O /home/pi/Desktop/
wget http://www.seismometer.info/files/Desktop/system_update.desktop -O /home/pi/Desktop/
wget http://www.seismometer.info/files/Desktop/typhon32.desktop -O /home/pi/Desktop/
Overclocking
There are two configurations available, the first one with normal speed (no overclocking), the second with slight overclocking, which is about 6% faster. In this project the second is used. Please note, that your warranty might be lost, if you use overclocking. Since here an old Raspberry Pi is used, the warranty has no real value anymore.
After changing the config.txt file, boot the Raspberry Pi two times in order to activate the new settings.
Please note: All settings here are for the Raspberry Pi 3B, other models might have different values.
Configuration without overclocking: Enable SPI- and I²C and use normal speed for Raspberry Pi 3B:
sudo wget http://www.seismometer.info/files/config/config_standard.txt -O /boot/config.txt
sudo wget http://www.seismometer.info/files/config/modules -O /etc/modules
Configuration with overclocking: Enable SPI- and I²C and overclock slightly:
sudo wget http://www.seismometer.info/files/config/config_overclocking.txt -O /boot/config.txt
sudo wget http://www.seismometer.info/files/config/modules -O /etc/modules
You can check the config settings by:
sudo nano /boot/config.txt
These are the current settings for the Raspberry Pi 3B:
# For more options and information see
# http://rpf.io/configtxt
# Some settings may impact device functionality. See link above for details

# uncomment if you get no picture on HDMI for a default "safe" mode
#hdmi_safe=1

# uncomment this if your display has a black border of unused pixels visible
# and your display can output without overscan
#disable_overscan=1

# uncomment the following to adjust overscan. Use positive numbers if console
# goes off screen, and negative if there is too much border
#overscan_left=16
#overscan_right=16
#overscan_top=16
#overscan_bottom=16

# uncomment to force a console size. By default it will be display's size minus
# overscan.
#framebuffer_width=1280
#framebuffer_height=720

# uncomment if hdmi display is not detected and composite is being output
#hdmi_force_hotplug=1

# uncomment to force a specific HDMI mode (this will force VGA)
#hdmi_group=1
#hdmi_mode=1

# uncomment to force a HDMI mode rather than DVI. This can make audio work in
# DMT (computer monitor) modes
#hdmi_drive=2

# uncomment to increase signal to HDMI, if you have interference, blanking, or
# no display
#config_hdmi_boost=4

# uncomment for composite PAL
#sdtv_mode=2

#uncomment to overclock the arm. 700 MHz is the default.
arm_freq=1300 # CPU frequency (default 1200)
gpu_freq=500 # GPU frequency (default 400)
core_freq=500 # GPU frequency (default 400)
sdram_freq=500 # SDRAM frequency (default 450)
over_voltage=2 # 1,25V (default 0)

# Uncomment some or all of these to enable the optional hardware interfaces
dtparam=i2c_arm=on,i2c_arm_baudrate=400000
dtparam=i2c1=on
dtparam=spi=on

# Uncomment this to enable the lirc-rpi module
#dtoverlay=lirc-rpi

# Additional overlays and parameters are documented /boot/overlays/README

# Enable audio (loads snd_bcm2835)
dtparam=audio=on
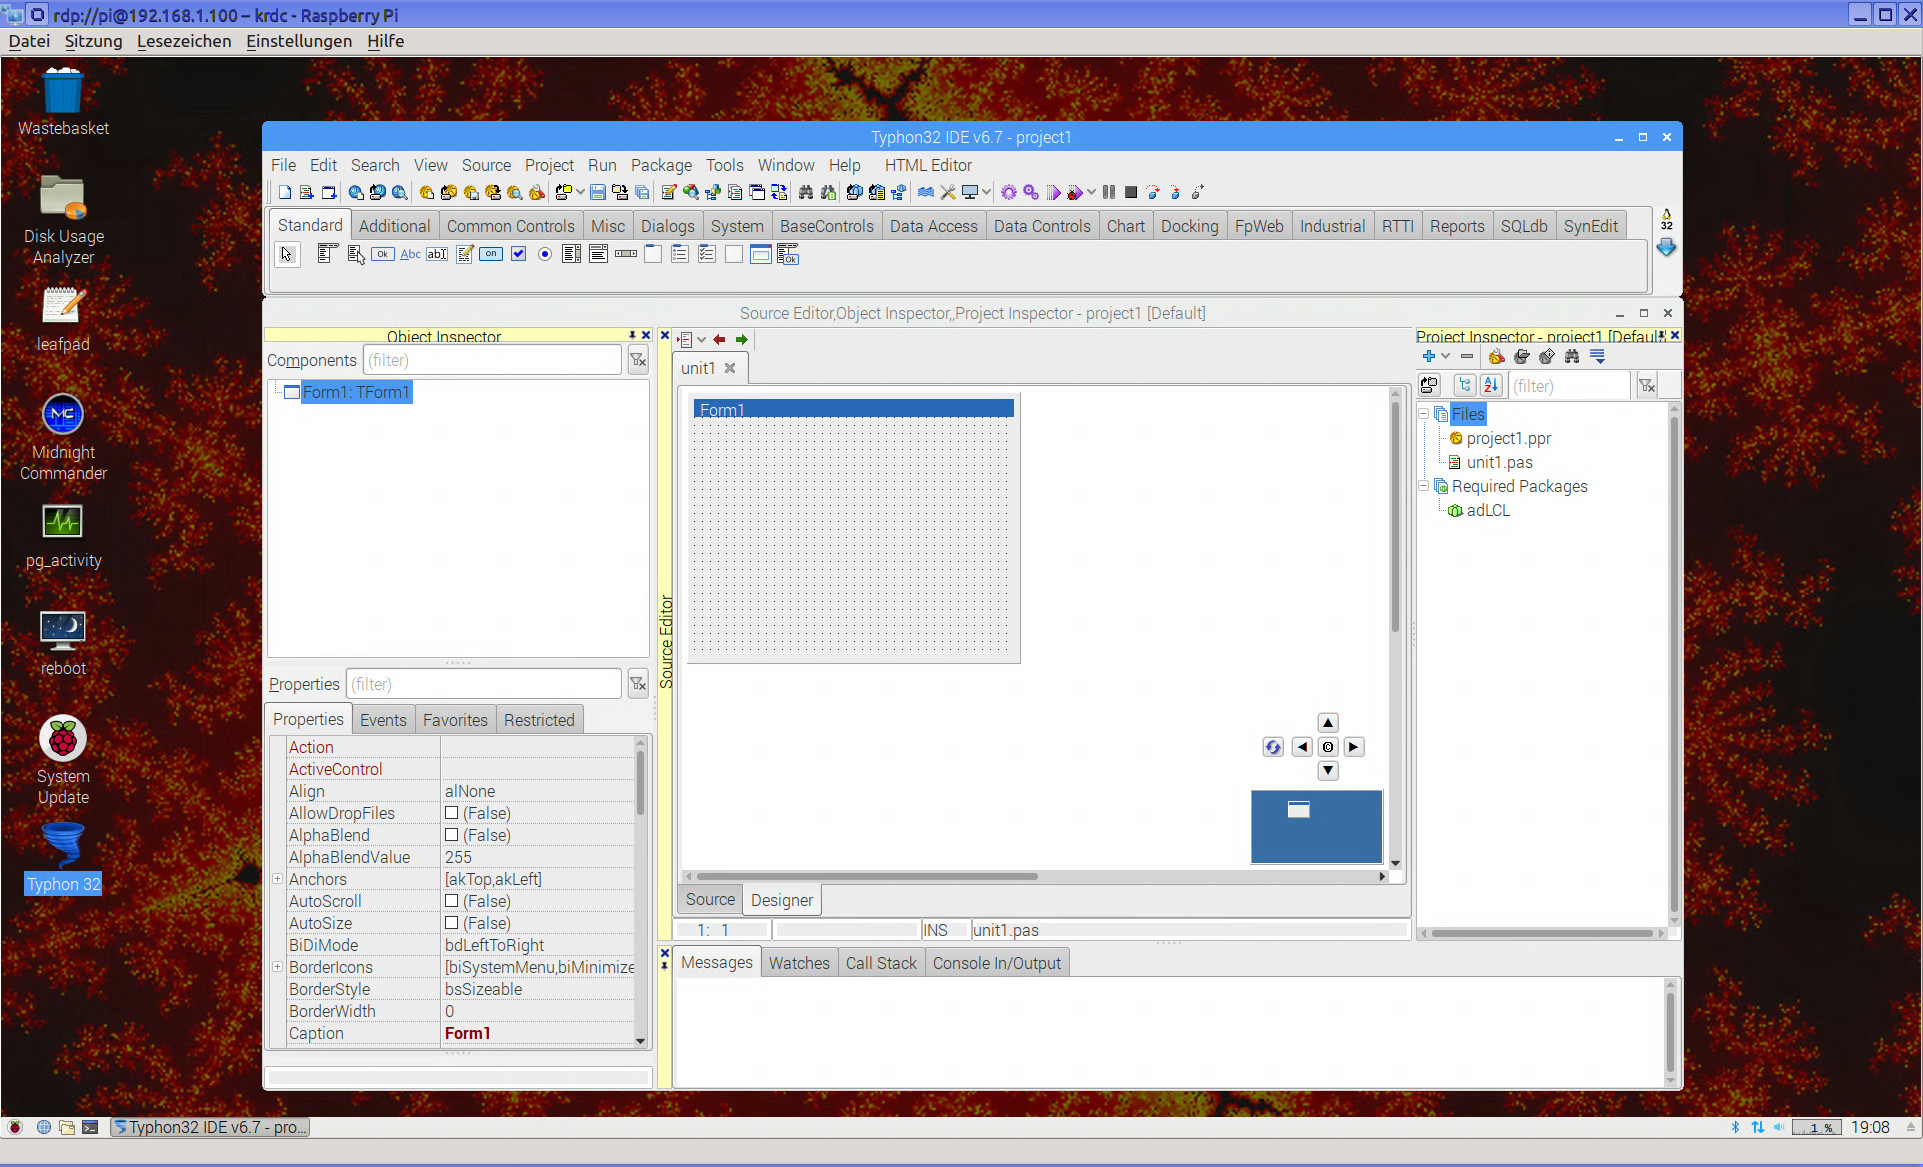
Final result
If you start Typhon32, the final result of the setup should look like the image below. The Raspberry Pi is ready for further software and hardware development. 🙂
Leave a Reply
You must be logged in to post a comment.